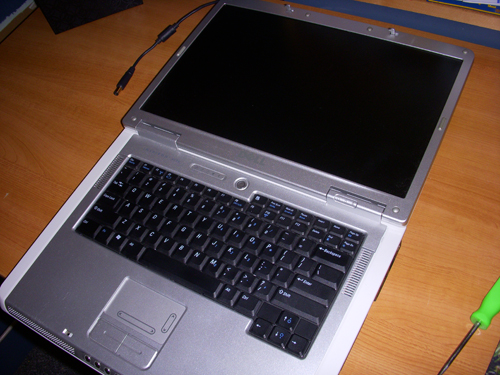
Today I replaced the keyboard on my sister’s Dell Inspiron 6000 laptop. She broke off one of the keys somehow, luckily I had it under warranty to get a free replacement keyboard shipped to me. The process is very simple and takes hardly any technical knowledge to do it.
These steps will work on ANY Dell notebook computer.
There is one variation for new models, but that will be made clear in it’s step.
Step 1 (the obvious step) – Obtain a new keyboard
Step 2 – Lay the screen flat so that you can remove the first part.
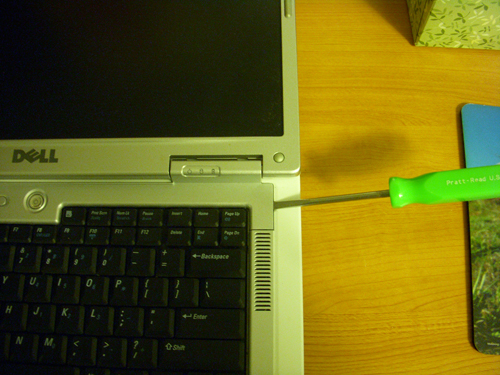
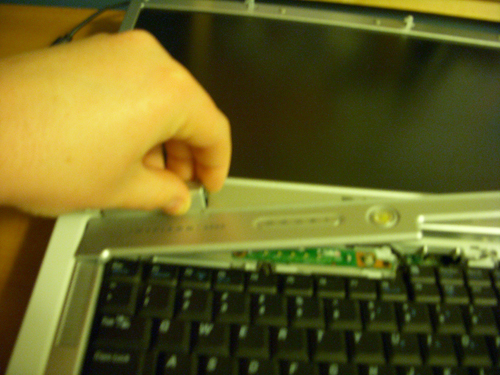
Step 3 – Insert a flat head screwdriver into a small slot on the right of the top casing piece. Don’t worry about damaging it, it is meant for a small flat head screwdriver to be inserted there without hurting the casing.
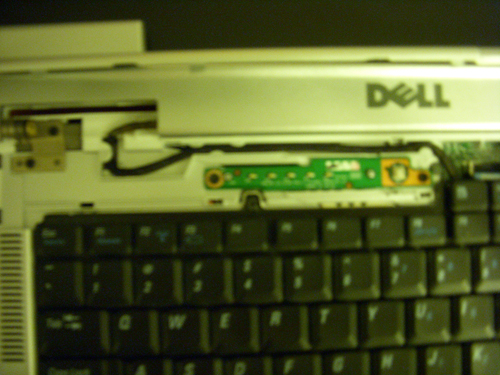
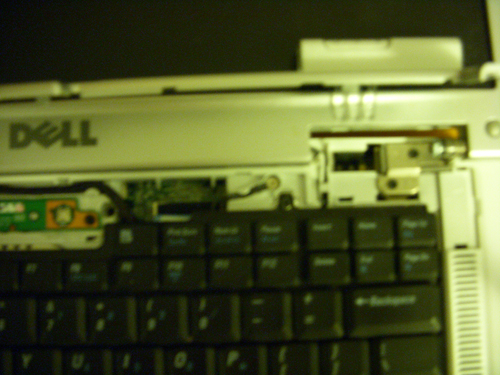
Step 4 – After popping the right side off with the screwdriver, just stick your finger under there and gently pull up, eventually popping off the middle and left side. Don’t worry, it may seem like you are going to break it but it will come off, just don’t use King Kong force.
Once it is completely off, remove the two screws holding down the existing keyboard. They are located on the top left and right of the keyboard, both black screws.
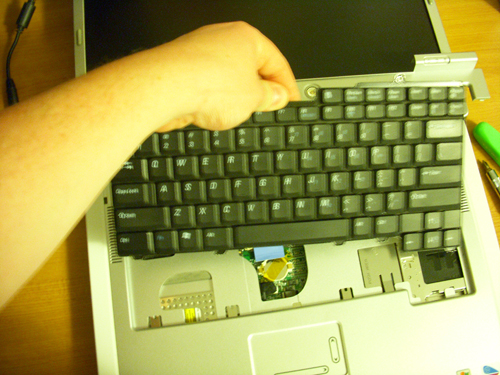
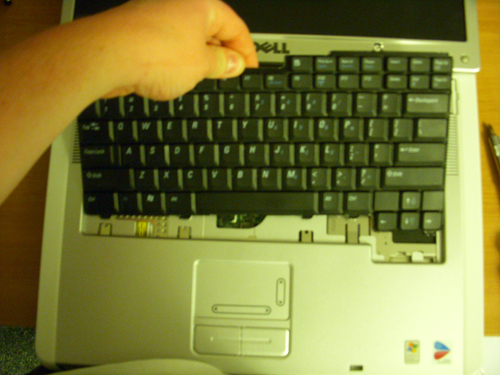
Step 5 – With the screws removed, place your hand on the top part of the keyboard and lift it up slightly. Then pull the keyboard towards the screen (away from you) until the bottom part comes out of the slots on the bottom. CAUTION: If you pull too hard and go 1/2 way across the room with it you could damage the connector on the motherboard.
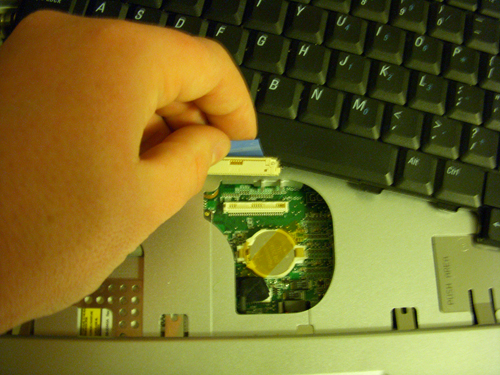
Step 6 – Disconnect the keyboard from the motherboard.
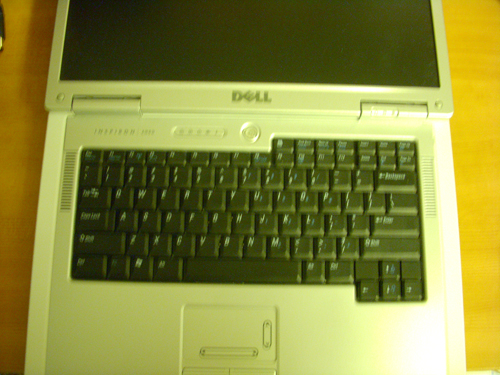
***NOTE*** This is where some variation in models occurs. The older models, like the one in the picture, will have a tab for you to pull directly UP (not towards you) to remove the cable from the motherboard.
Newer models will have the cable snapped under a clip. To remove that, stick your finger between the clip and the cable where it connects and pull up to loosen the clip, then slide the wire out.
Step 7 – Grab the new keyboard. Replace the cable in the same but opposite way you removed the old one. If you have the cable like the one pictured, just simply push the connector into the one on the motherboard. If you have a newer model, slide the cable into the connector and push the clip back down to lock it in place.
Step 8 – Slide the bottom of the new keyboard into the slots while still holding the top part up a little bit. Replace the two screws you removed from the old keyboard.
Step 9 – Snap the top casing piece back into place. Start from the left hand side. You will see how you slide the left end into place then snap it down going from left to right until it’s all the way down.
Step 10 – VOILA! You’re done! Just make sure to turn it on and test that the keyboard works (notice the first and last steps are the easy ones!).
If you get stuck on any part you can contact me or post it here and I will respond.
Hope this was helpful!
Hi there,
Nice instructions. I linked to this guide from my site where I post all useful laptop repair guides.
Thank you very much! This is very helpful. It’s way cheaper to do it yourslef than to bring it to the shop.
Hi,
Do you remember what model the replacement keyboard is? I have a Dell Inspiron 6000, and I also want to replace my keyboard.
Thanks!
Thanks……..i just followed ur steps.
Please tell me the procedure to replace ram allso.
Spazznie,
My 6000 was Part# H5639 – KYBD,87,US,ENG,S-PTG,STB
If you call Dell support they can get you in touch with a sales rep and get the correct part for you, just give them your service tag.
Dr ravi Kumar Sivva,
To replace the ram, unscrew the main compartment on the bottom. It typically had the Windows serial key sticker on it with small little vents, right in the middle on the bottom.
Once you open that part, push the silver clips on the side of the RAM away from the RAM chip and pull the RAM out of the socket. It may seem tight but that is ok, just don’t use the force of an elephant.
To put new RAM in, be sure to line up the notch correctly and put it in the same way you took it out.
For picture detail, please see http://support.dell.com/support/edocs/systems/ins6000/en/sm/upgrades.htm
If you don’t have an Inspiron 6000, just go to http://support.dell.com and in the search bar put “replace ram your-model-here” hit search and then click Manuals on the left under Narrow Your Selection.
Thanks Joe
Your directions are so esay to follow. However, I’m a little confused. I read another page that said the battery and hard drive had to be removed first , also one had to ground oneself while working on the replacement . Did you do any of that prep
before hand ? Lord ,I hope not. :-)
Thanks for your page , Joe.
Jae D.,
Battery and hard drive do not need to be removed for the installation. However I do suggest removing the power adapter and battery just to be sure the laptop has no power to it since you will be disconnecting something, you don’t want to accidentally turn it on while you have it open.
As for grounding yourself, it is always a safe measure but if you are careful there is no need, you aren’t dealing with a part that is sensitive to electrical shock. I tend to stay on the safer side and ground myself when doing any internal computer work. Just wear shoes if on carpet and be sure to touch something metal before opening the laptop if you are worried.
Hope that helps.
Thank you ,Joe.THat’s a big help . Now all I
have to do is figure out which one is the battery . lol
Thanks again ,
Jae
The battery is typically the one that comes out by sliding some lock, the hard drive needs to get unscrewed and is about 1/2 the size.
Thanks man. I was jvst abovt to make a hvge mistake.
(where v = letter between y and i; hence reason for keyboard replacement)
hey joe tell jamie i said hi
This was VERY helpful, took me about 10 min’s start to finish. Thanks for the help, picture along with instructions were a huge help!!
Nice blog.Very informative.
Great – on a Saturday – thanks a lot. Appreciated.
Great, thanks!
Folks,
I just replaced my dell keyboard with your advice. The first time I had to replace it, it cost me about $150, this time I bought the keyboard on ebay for $20 and replaced it myself. From a poor man, thank you very much. The instructions were perfect and easy to follow.
Joe5348
Thanks so much! Those steps were super-easy to follow, and the pics really helped.
THANK YOU! Took 5 minutes and the pics were VERY helpful.
I love it! That is way cool man! The steps weren’t that complicated too, which is great.
Hey Joe-
Great advice! I don’t know anything about computers, but I followed your instructions and the keyboard works perfectly. Cute wife too! ;)
Thankyou very much, this was maintenance made easy!
Thank you so much for these instructions! My cat knocked a glass of water onto my laptop and this was a big help in getting the keyboard off. Hopefully with some drying time it’ll be alright. The pics were a huge help.
@Amanda
Ouch! I hope it didn’t fry anything and it does dry out for you!
Thank you, very helpful.
Thanks you …………
Great instructions. My daughter lost one of the “shift” keys. I got a replacement from Dell, cost about $50 bucks (I think was a little on the high side) and just followed your instructions……….piece of cake!
Thanks again
I was wondering what warranty you had. I have a dell inspiron 1545 that one of the keys just broke on. My warranty says 2 year limited warranty. And I was wondering if the keyboard would be covered.
@Jenifer
Jenifer,
I believe under the limited warranty its only certain parts and you have to ship the computer back to them, but I do think they send you a label. I think the keyboard falls under their complete care package, not the normal hardware warranty, but its worth a phone call to them.
Even if you have to purchase a keyboard from them its very cheap, around $17-$25.
Hi there,
Great post. I have a problem and am not sure what is causing it. I actually ordered a new keyboard for a dell inspiron six thousand (my six key amongst others not reponding). I noticed that there is an older type connector on this mainboard, but for starters they sent me the wrong keyboard. I had a few keys missing from an old inspiron I am fixing for my daughter. I was a bit peeved that the new keyboard ribbon did not fit snug into the connector (the one where you have to pull it up to remove the connector from the board. When I reseated the old keyboard (and I checked it was all in nice and flush and snug) some of the keys did not respond.. It seems to be the five, six and delete key. I have reseated the keyboard a million times and still, those keys do not respond. I cleaned with an air can to remove debris just incase but no luck. any suggestions?
many thanks.
Darren
@Darren
Since its only those 3 keys I would say that possibly a defective part they sent you. But it’s tough to say for sure since the 6 key seemed to be out on the old one as well, so it could potentially be other issues. I would contact Dell support again and let them know some of the same keys on the new keyboard are out again. They will be able to help you further. Even if you don’t have support Dell will always troubleshoot for free.
Thanks for your reply. I solved the problem –
The old (original)ribbon was a bit knackered and creased to hell probably explaining why some keys did not respond properly.
On ordering previously I had assumed that the dell inspiron 6000 was the same as an E1505 (Don’t ask why – i kicked myself a few times). After re-ordering for the 6000, I was refreshed to find the keybd came with a new keyboard connector. BINGO!
Thanks so much for getting back – have a fantastic New Year!!!
Darren
Thanks so much for the instructions! I did have a bit of carelessness on my part, and when I tried to unhook the clip to remove the keyboard, the clip broke, and now I can’t secure the connector. Do you know how or where I would look to buy a new part!
Thanks,
Patrick
@Patrick
That’s a tough one, don’t think you would be able to buy just that one part, may need a whole motherboard.
Best bet is to call Dell. Even if you don’t have a valid service contract they can still help you and tell you what your options and costs are.